| As part of my little shopping
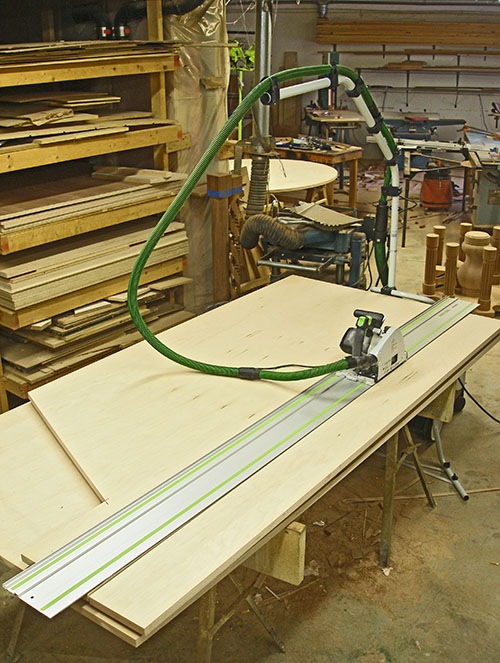
spree a few weeks ago, I picked up the vacuum boom arm for my Festool
dust extractor. I had used one of these when I visited the Festool
factory in Germany this December and I was so impressed, I just had to
have one. It took a little begging on my hands and knees, but I also
got my hands on one of vacuum hoses with the integral power cord inside
the hose (these aren’t available in the U.S.) In the several weeks
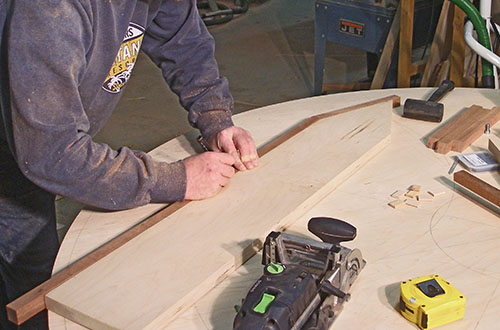
since I took this picture, I have really come to love this thing. The first step in making the arrow shaped leaves was to cut the stock from the sheet of Appleply. I had a couple of sheets down from the rack, so I used the lower sheet as a worktable and separated the upper sheet with blocks of wood while cutting it up. |
 |
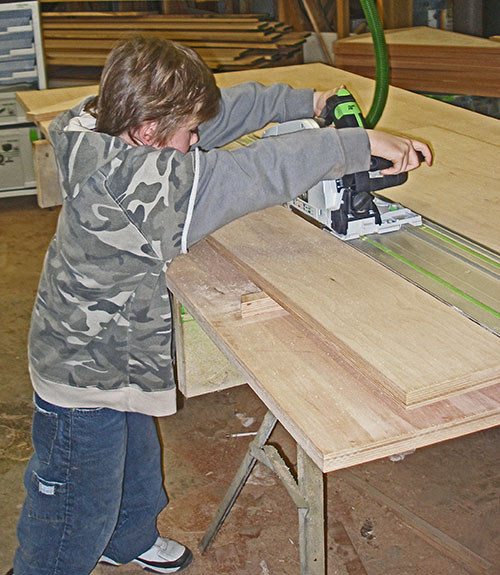
| I overdosed on some anti-aging
medication, but it made me feel chipper enough to tackle these long
rips with the saw, but for some reason I had a hard time reaching the
saw without standing on my tip-toes. Oh wait, that’s not me; that’s my son Tanner. No wonder I seemed so short. Because these pieces all need to be identical in size, I oversized the cuts with the circular saw and then recut them on the tablesaw.
|
 |
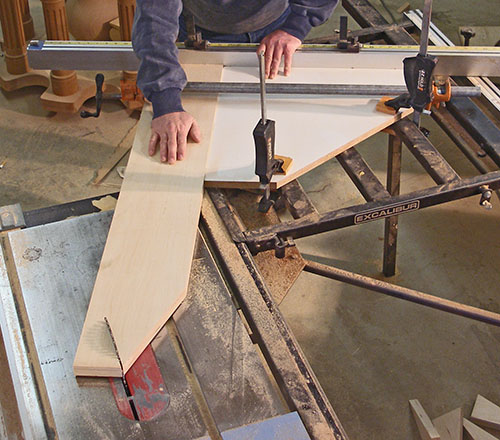
| I had mentioned previously that I
left the sliding table fence set to the accurate 22-1/2 degree setting
until I could make this last cut. Even though I had visualized the
setup for this cut the whole time, it hadn’t dawned on me until I was
setting it up that I would have to recalibrate the fence all over again
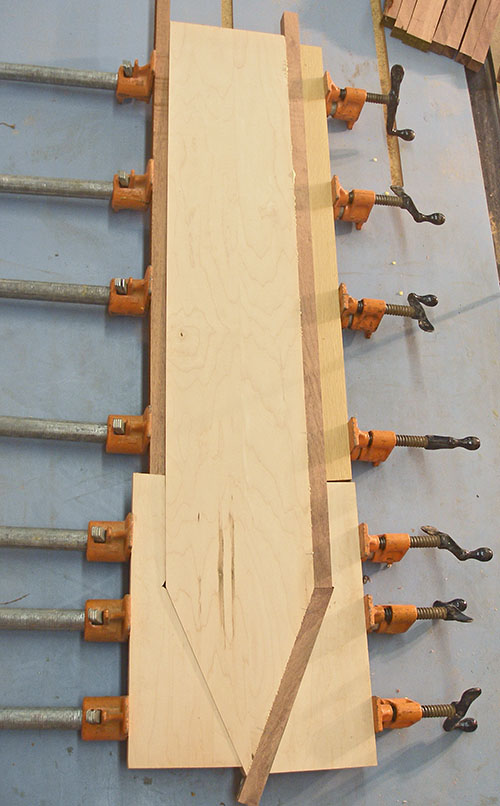
anyway! The angles for the wedges were registered off the back edge of each piece, but with the length of the arrows, these needed to be registered off the sides of the pieces. I knew this from the beginning, but the consequences didn’t click right away. If you haven’t guessed yet, if that piece of melamine plywood I am using as a guide is not perfectly 90.000 degrees, then my angles are for naught. That piece of melamine against the fence is actually a very accurate 45 degree jig I keep in the shop, but the 90 degree corner is off my a few thousands of a degree. So yup, I had to recalibrate the fence anyway. The way I set up these cuts was to clamp the melamine square down to the sliding table to prevent it from moving. Then to keep the arrow pieces tight, I used a pipe clamp to draw them tight to the square. If I hadn’t clamped everything up this way, the arrows would have drifted into the blade. This would have not only screwed up the angle, but would have resulted in a dangerous binding situation. |
 |
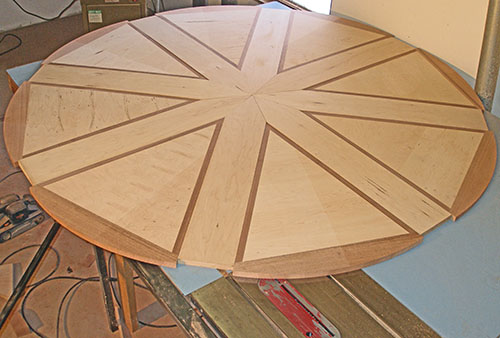
| Just like when I cut the wedges,
I got lucky and managed to cut the angles for the arrows on the second
iteration. What is kind of ironic is that the final setting for the
arrows was the same setting I started with for the wedges. To test my angles, I wanted to lay out the whole table. At first I started putting the pieces on the substrate, but quickly realized that the wedges wouldn’t balance. So the only table large enough to put all of the pieces on was the extension table of the tablesaw. It’s about 5 feet by 8 feet. Even though this looks large, keep in mind that I still haven’t added the edging to the arrows. The table is actually 3 inches larger in diameter than this. |
 |
| I milled up the 1-inch edging
from a plank of mahogany. After cutting the pieces to rough size and
mitered at the middle corner, I got ready to join them to the plywood
base. Since these were not high-stress joints, I used the smallest size Dominoes for joining the pieces: 5mm x 30mm. After using Domino for a while now, I also realized that the easiest way to line up my mortises was to use pencil lines like I have always done with biscuit joints. I decided to play around with the video capabilities of my still camera and recorded a movie of cutting the mortises and then dry fitting the pieces before gluing. Steven Spielberg has nothing to worry about with this video, but you need to realize that I had to be director, actor, camera operator, and producer all at the same time. It can be a little distracting thinking about so many things at the same time to make this work, plus I don’t have any video editing software, so it had to be one-shot from start to finish. If you’re interested, the video is uploaded to YouTube. Click Here. |
 |
| Clamping the edging presented a
whole new set of problems. With the shape of the arrows, I couldn’t use
the same jigs that I used for the wedges. There was no edge for them to
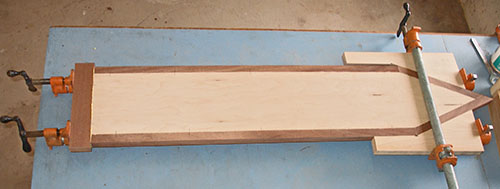
register against. Instead I cut these angled pieces. The concept is that the third clamp from the end grips the pieces and stops them from slipping down the slope of the point. Once this clamp was tightened, then I could tighten the two clamps on the angled sides. I put the edging on one side at a time. This way I didn’t have to worry about trimming the wood to exact length. After gluing this first side, I trimmed the wild end to be flush to the plywood. |
 |
| The only part of this edging that
will be visible is the end cap, and this will be adjacent to the
endcaps of the wedges. To make sure that the endcaps of the arrows
match the endcaps of the wedges, I kept the left over piece from
cutting the wedges. I used the remaining plank from the wedge’s endcaps to cut the arrow endcaps. This way, the exposed edge of the entire table will be consistent all the way around the table regardless whether it is open or closed. All of these pieces came from the same board. To clamp up the ends, I used the previous clamping blocks and drew them together with one clamp. This gave me a flat surface to draw the main clamps against. |
 |
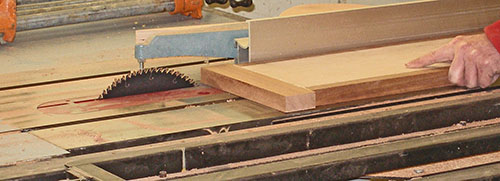
| In several of the process I
explained that I trimmed the wild-end of boards flush. The way I did
this was to draw the fence back behind the blade and set the fence
flush to the offcut-side of the blade. Then I fed the piece through the
saw like a normal rip. The arrows will be laminated on both top and bottom because they are removable from the table and the underside will be visible. As I mentioned previously, I won’t take photographs during the lamination because it is too much of a distraction to the work process. |
 |
Up Next: Laminating the Pedestal Base. |
|
| <<PREVIOUS NEXT>> |
 |