|
Preface: I actually started turning these columns
before turing the center column, and this was before I started
documenting my work. However, I didn't finish these columns until
later. That is why I wrote about them after the center column, and also
why there are fewer pictures.
Wood Preparation
For the eight fluted columns around the
outside of the
pedestal, I wanted to make sure that the wood grain and color was
consistent,
so I hand picked a mahogany plank large enough to get all of the
columns
from the
same board. I started out by planing a 12-foot long by 14-inch wide by
2-1/2-inch thick plank of mahogany. I think it weighed at least 150
pounds. After surfacing
the plank, I cut it into more manageable
segments and jointed and ripped them into 4-1/2 inch wide pieces for
glue-up (3
rips per segment).
This plank of wood was more than I needed
for the columns, but because two of the resulting pieces had
visible structural
defects in the grain (cleaving grain), I decided to cut the entire
plank into
turning blanks, resulting in 5-more pieces than I actually needed. This
would
give me enough material to make 2-1/2 extra columns. Instead of
throwing away
the two flawed pieces, I decided to use them as a
“machine-setup” column. In other words, this was a sacrificial column
that I
could ruin in the process of setting up subsequent machining, but it
would
never be used beyond that. The other pieces also gave me one extra good
column
as a spare just in case something went wrong, which of course, it
did!
I
got into quite a “groove” turning these columns, and
the round blanks were coming out extremely accurate and consistent.
However,
since this is before I started taking pictures, this topic is rather
dull and
boring, so I will skip ahead a couple of steps and dive into the
fluting task.
This is when I began documenting my progress.
|
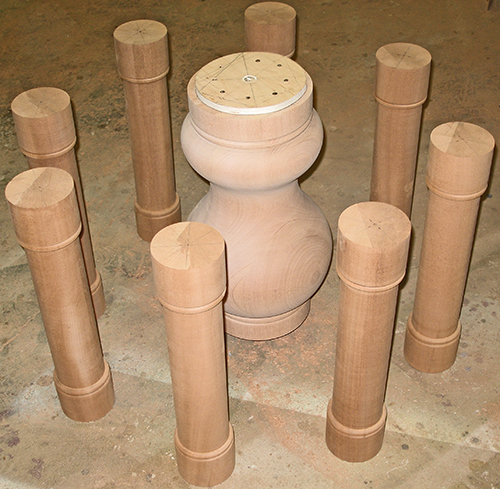
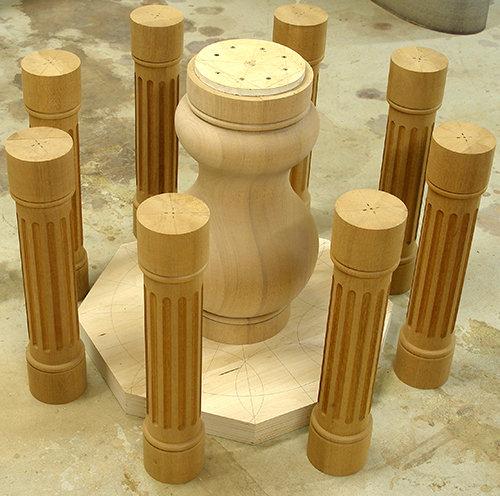
I forgot that I had this picture, but it is the only one I
have of the unfluted columns. I set all of the columns out on the floor
just to get an idea of the scale and design of the pieces to make sure
that what I was visualizing during the design was how the actual parts
would look.
|
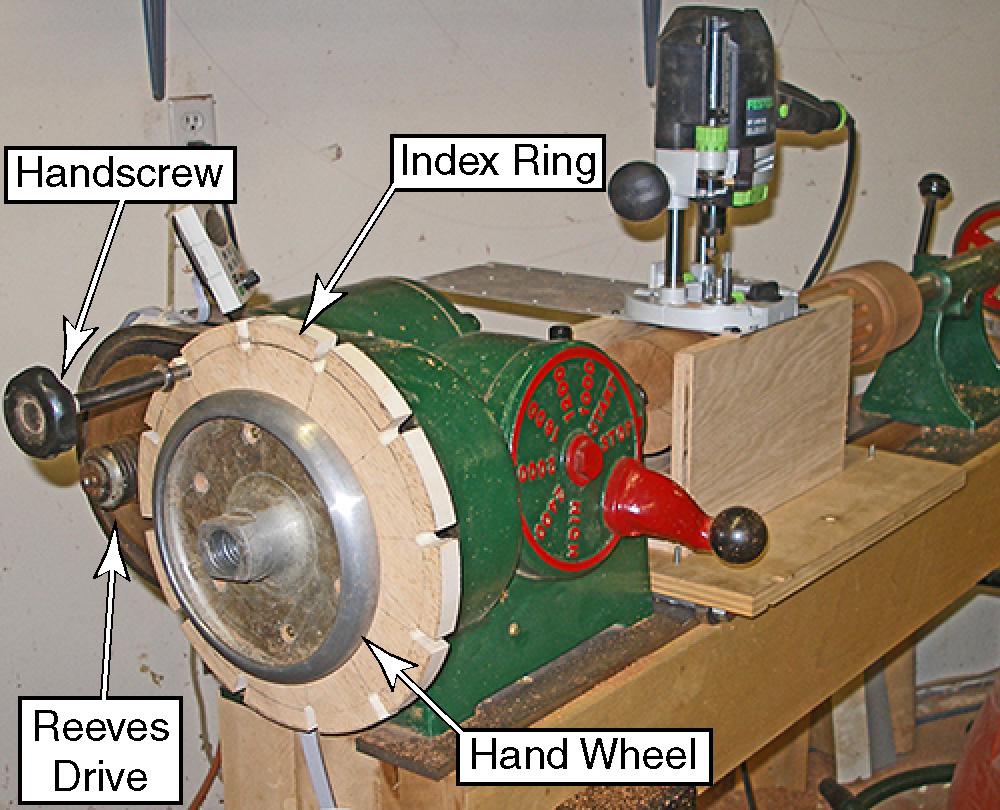
Indexing Ring
I knew that the best way to flute the
columns was to keep
them mounted on the lathe and run the router on rails over them,
but my Oliver
lathe was not easily adaptable for indexing the turning every 30
degrees. So I
decided to create a sled for the shaper. This didn’t work. The first
column went
OK, but the second column went south. Since I had only one spare column
and
couldn’t afford to ruin another one, I decided to take the time to make
a
router carriage for the lathe.
It took a while to figure out how I could
make an accurate
indexing ring without altering my vintage Oliver lathe. I removed the
bell
housing from the reeves drive, inverted the hand wheel, and screwed the
indexing ring onto the back of the hand wheel. I slotted the indexing
ring so I
could run a bolt through the ring and into the original mounting hole
for the
bell housing. I later discovered that the big handscrew from my
shaper’s
fence fit the bolt hole. This made changing the index a lot easier. It
doesn't look very pretty, but it sure worked well.
|
 |
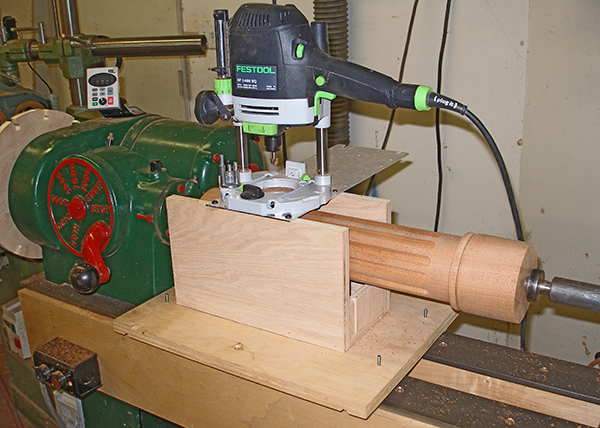
Router Carriage
The router carriage for the lathe was
actually easy. I already had
the base of the carriage built years ago to hold my drillpress to make
a large set of hollow
spiral columns.
It uses bearings as wheels and is captive between the steel rails of
the lathe
bed. I mounted my Festool OF1400 router to an aluminum sheet and
mounted that
to the carriage.
I positioned the router so the carriage
would hit the lathe's headstock at the top of the flutes. To control
the bottom position of the flutes, I used the tailstock as an
adjustable stop. I could change the position of the end of the flutes
by increasing or decreasing the extension of the live center.
To flute each column, I locked the indexing
ring into one
slot. I then moved the carriage toward the headstock and plunged the
router
down
into the column. I then rolled the carriage to the side until it hit
the base
of the tailstock. With each
single flute complete, I had to remove the hand-screw, rotate the index
ring to the
next slot, and repeat this 12 times for each column. It was mind
numbing
redundant work, but with this setup, it was error-proof.
|
 |