|
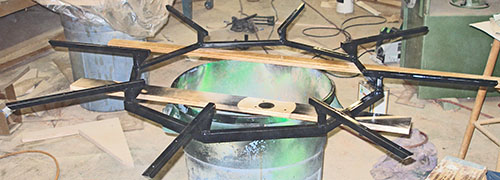
Because so much of the table’s structure is cantilevered beyond the pedestal, I designed a welded steel frame to support the substrate sheet. Furthermore, the subframe provides the space between the substrate and the pedestal for the mechanical system that operates the table. The subframe showed up from the welding shop
last week. The
first thing I needed to do was drill mounting holes into the arms and
octagon.
The frame permanently mounts to the substrate and is part of the upper
table
mechanism. The octagon portion of the frame bolts to the pedestal, and
this
will be separated for shipment across the country. |
 |
|
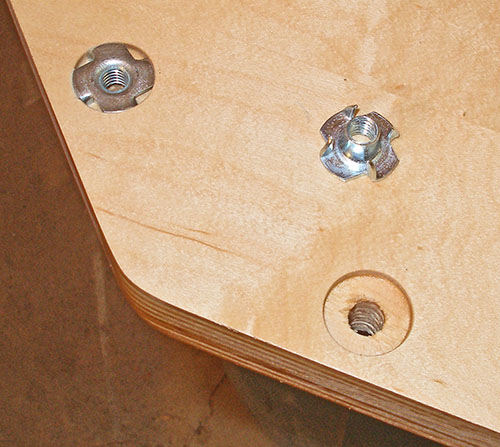
Welded steel assemblies cannot be as precise as other types of wood and metal work, so I had already assumed that the octagon of the frame would not be a perfect octagon. So the first thing I did was trace the interior of the octagon onto a sheet of 1-inch Appleply and cut it to fit the frame. I rounded the corners to account for the weld beads in the corners. This would be the cap for the pedestal. I didn’t want to have exposed nuts or bolts protruding below the plywood cap of the pedestal, so I installed 1/4-20 T-nuts to the underside. I used a forstner bit to countersink the T-nut into the wood so they would be slightly recessed when installed. After sanding and lacquering the plywood cap, I drove the T-nuts into the plywood with a socket wrench extension to prevent marring the wood with the hammer. These T-nut will allow the frame to be removed and re-installed onto the pedestal for transportation. |
 |
| I installed the plywood cap onto the pedestal with a ton of construction screws (40 I think). Even though they will never be seen by anyone besides the installer of the table, I made a jig to locate the holes evenly above the 8 columns. This jig wraps around the plywood cap so I can drill the holes from above, but the lower piece (shown upside down) centers the jig on the column underneath. The angle of the spacer piece lines up with the edge of the plywood cap so the screws are oriented radially in line with the center of the table. |  |
|
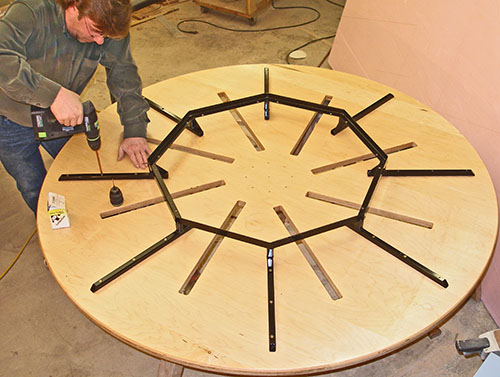
I bolted the steel frame down to the pedestal. I wanted to test-fit it to make sure it fit properly, plus I was planning on installing the substrate to the frame while it was bolted to the pedestal. My thinking was that if there was any type of warp or twist to the frame, I needed to know about it so it could be corrected. After moving the substrate onto the frame I confirmed that everything was lined up nicely. The eight support arms were even pre-stressed with a slight rise toward the outside to counteract any tendency to sag.However, I realized that trying to accurately secure the substrate to the frame in this position was going to be too difficult because I would be working below the table and trying to line everything up. So instead, I unbolted the frame from the pedestal and mounted it to the substrate disk separately. Oh, I don't show it here, but I did place the substrate on top of the frame to check everything out. The picture I took below showing the tools I bought was actually from this time when the substrate was temporarily on the frame. |
 |
|
When I moved the substrate disk back to the sawhorses, I flipped it over with the bottom side up. I ran a 1/16-inch round-over bit around the slots in the center, and a 3/4-inch round-over bit around the perimeter. However, with the 3/4-inch bit I kept the elevation high so it only partially rounded the corner. I sanded the underside and edge, then sprayed it with lacquer. After the lacquer was dry, I pilot drilled the mounting holes and screwed the frame to the substrate. Here’s a tip for those of you with more than
one Festool
drill. You may have noticed in a few of my pictures a second keyless
chuck
resting nearby. When I need to switch bits frequently, such as piloting
and
screwing, I use the chucks from my other drills as quick-change chucks
to
easily switch between drivers. It really works great. After the frame was secured, I installed the
substrate onto
the pedestal in preparation for installing the remaining hardware. |
 |
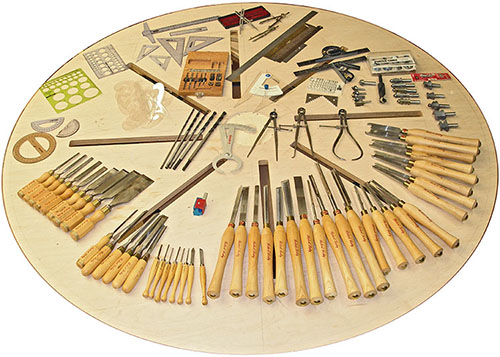
| Preface: I know this has almost nothing to do with
the table project, but since I used the table to lay out and organize
my new tools, it seems appropriate to this page. This picture was
actually taken a few hours before the one directly above. Well, I went on a little shopping trip yesterday. It was a private woodworking estate sale by invitation. Feeling a touch of my own mortality, and the thought of the subsequent liquidation of my own workshop, I had the predisposition of wanting to find a good deal, but not wanting to take advantage of a non-woodworker’s lack of knowledge. Much to my surprise, and relief, I was quite impressed by the research and forethought that this individual put into preparing for the sale of the assets from this fully stocked workshop. Consultants were brought in beforehand to provide this person with the retail price for each tool and an expected resale percentage of new. Given a rather savvy seller, I knew that my best chance for a good price was to bargain on volume. I saw a box with several turning tools sticking out, and since I needed a new set, I said I would take what ever was in the box as a whole. Most of the tools were wrapped in paper, so neither of us knew what was in there, but he/she did make a count of handles and put in a call to one of his/her consultants. The price came back higher than I could justify, so I grabbed a few other things I was looking at and said I would accept his/her offer, but only for the whole batch (not everything is shown here). Because most of what I was buying was almost sight unseen and by the box, I really didn’t know what I had bought until I got home and unpacked everything. I spent way more than I wanted to, but I am pleased with what I got. I made a good deal, but I also left the sale with a clear conscience of not taking advantage of the situation either. There are complete sets of matching right/left ring tools, beading tools, gouges, scrapers, parting tools, complete mini turning tools, mortising chisels, standard chisels, and a bunch of other random stuff. Most of the turning tools had never been used and were still in store wrappers. One box had all of the measuring and marking tools, and what finally capped off the deal was the handful of moulding router bits. So even though I got a good deal, most of these tools would have gone unsold had they not been sold as a whole. |
 |
| Actually, in hindsight, I did get almost too good of a deal on the 6-foot bar clamps, but it wasn’t deliberate. We had about 60-seconds to look at a huge rack of clamps before this person needed to leave for a prior engagement. I didn’t like the style of most of the clamps, but I did like the six, 6-foot Jorgensen bar clamps. He/she suggested $60 to $80 for all of them, and without even thinking (aside from how much I had already spent) I said, "OK $60". It wasn’t until we were driving home that the mathematics set in and I realized I had bought these for $10 each. | 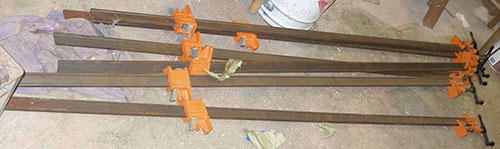 |
Up Next: Alignment Pins and Sockets. |
|
| <<PREVIOUS NEXT>> |
 |